If you’ve ever held a perfectly formed plastic toothbrush, a precise medical component, or even a colorful toy figure, chances are it came from a two-piece mold. As someone who’s spent the last decade running a small, specialized two-piece mold shop, I can tell you this process is equal parts art and science—there’s a reason even a tiny flaw in a mold can set a production line back for days. What most people don’t see, though, is that the magic starts long before you pour any plastic, with a series of precise machining steps that turn a block of steel into a tool that can make thousands of identical parts. Today, I’m walking you through exactly what goes into machining a two-piece mold, straight from the shop floor where I’ve worked on hundreds of these tools. Two Piece Mold
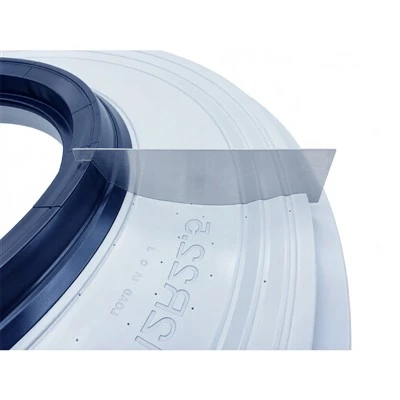
First, let’s get clear on what a two-piece mold actually is, because that’s the foundation of everything that follows. Unlike multi-piece molds (which have core pins, slides, and side actions for undercuts or complex geometry), a two-piece mold is just two main halves: the cavity half (the side that forms the outer, visible surface of your part) and the core half (the side that forms the inner, usually functional surface). For simple parts like a disposable cup or a basic toy block, this is all you need. No extra moving parts, no complicated alignment tricks—just two halves that clamp together, have a channel for molten plastic to flow in, and a place for air to escape, then separate so you can push your finished part out. That simplicity is why two-piece molds are so popular for high-volume, low-complexity parts, but don’t let their basic design fool you; machining them requires precision that’s measured in thousandths of an inch.
The entire machining process starts before we even touch a mill or a CNC machine. The very first step, which I stubbornly refuse to skip even when a customer is rushing me, is material selection and prepping the mold base. Not all steel is the same for mold work. For low-volume prototypes or parts that don’t need high heat resistance, we might use P20 steel—it’s affordable, easy to machine, and holds a finish well. For high-volume production, like a part that’s going to be made 100,000 times a year, we go with S7 tool steel, which is tougher, more wear-resistant, and stands up to the repeated clamping and heating that comes with daily use. We also pre-buy the mold base, which is the standard, off-the-shelf (or slightly modified) block that will hold the two mold halves, the injection nozzles, and the ejector pins. Before machining anything, we cut the steel block to the exact dimensions we need, then surface grind all six sides to make sure they’re perfectly flat and square. If the steel isn’t flat and square to within 0.001 inches, nothing else we do later will line up right—clamping the halves together will leave gaps where plastic can leak, ruining parts and wasting material. That’s the first lesson I learned as a new machinist: good prep work cuts down on mistakes later.
Next comes the step that gives the mold its shape: CNC milling of the cavity and core halves. This is where we take that prepped steel block and carve out the negative (for the cavity) and positive (for the core) of the part we’re making. We load the steel into a 3-axis CNC mill—our most used piece of equipment, by far—and upload the CAD drawing the customer provides. Now, I’ve had customers bring in drawings that look perfect on a computer, but when we run the first test cut, there’s a tiny overlap or a curve that doesn’t match their part. That’s why I always do a “proof cut” on a block of aluminum first, not steel. Aluminum is softer, cuts faster, and if we messed up the tool path, we can adjust it without ruining a expensive steel block. For a two-piece mold, the milling is split between the two halves: the cavity half gets the hollow shape of the part’s outer surface, while the core half gets the protrusion that makes the inner shape. We use different end mills here too—ball nose mills for curved surfaces, flat end mills for straight edges, and a tiny, 0.1mm end mill for any small details, like a part number mold mark or a tiny notch that fits another component. The key here is maintaining consistent depth and smoothness; rough, uneven cuts will leave marks on the plastic parts, and if the cavity is even 0.002 inches deeper on one side, the part will be lopsided. I check every cut with a coordinate measuring machine (CMM) as we go, so we catch mistakes before they get too big.
Once the CNC mill is done, the mold halves aren’t ready yet. We have to do EDM machining for the hard-to-reach areas, a step that’s non-negotiable for any two-piece mold that has fine details or sharp corners. EDM stands for Electrical Discharge Machining, and it works by using electrical sparks to erode steel—no physical contact between the tool and the workpiece, which means we can get into tiny, narrow spaces that a mill can’t reach. For example, if we have a tiny undercut (even a small one), a mill can’t get in there, but EDM can. We use two types of EDM in our shop: sinker EDM for 3D shapes and wire EDM for cutting thin, precise parts like the ejector pin slots or the sprue gate (that’s the channel where molten plastic flows into the mold). A lot of smaller mold shops skip EDM to save time, but I’ve found that leads to broken parts and higher rework later. Last year, I had a customer who brought in a mold they had made at a shop that skipped EDM, and the gates were so rough that every part had a big, ugly burr that took hours to trim. It cost that customer more money in the long run, so I never cut corners on EDM.
After EDM comes a step that makes the mold work smoothly and gives the parts a clean finish: surface finishing and polishing. Even with the most precise mill and EDM cuts, the steel has a rough, “machine” finish that’s not good for plastic parts. If we leave it like that, the plastic will stick to the mold, and you’ll get parts with streaks or tiny bumps. For a standard two-piece mold, we start with a coarse sandpaper, work our way up to a very fine grit, then use a polishing compound to get a smooth, mirror-like finish if the customer wants it. For parts that need a matte or textured finish (like a plastic phone case), we might do bead blasting or chemical etching instead of polishing, which creates a subtle texture on the mold that transfers to the part. I always check the finish by running a test plastic part first—if the part has a shiny spot where it shouldn’t, I go back and polish that area a little more. It’s tedious work, but it’s what separates a good mold from a great one.
Next, we have to machine the alignment system, which is critical for a two-piece mold. If the two halves aren’t aligned perfectly, you’ll get a “flash”—that thin, excess plastic that forms along the edge of the part, where the two halves don’t fit together tightly. To fix alignment, we machine precision dowel pin holes in both mold halves. We drill and ream these holes to a tolerance of 0.0005 inches, then install hardened steel dowel pins that fit perfectly into the holes when the two halves are clamped. No matter how many times we open and close the mold, those dowels keep it aligned. We also machine the sprue bushing and the runner system in this step. The sprue bushing is the steel piece that connects the mold to the injection machine’s nozzle; it has a tapered hole that lets molten plastic flow from the machine into the mold’s runner system—those small channels that carry the plastic from the sprue to the cavity. If the sprue is cut at the wrong angle or the runner channels are too narrow, plastic won’t flow evenly into the mold, leading to parts with empty spots (called short shots). I always test the runner system with a mock injection of wax first, which is cheaper than using real plastic, to make sure the flow is even.
Wait—did I forget heat treatment? That’s a big one, and I almost missed it because it’s often done by a specialized shop, not in our own. After all the rough machining, we send the mold halves out for heat treatment, which hardens the steel to make it durable enough for thousands of cycles. P20 steel is pre-hardened, so we don’t need to heat treat it, but S7 tool steel has to be quenched and tempered to reach its full hardness. The catch with heat treatment is that it makes the steel expand slightly, so after it comes back from the heat treat shop, we have to do a final “finish machining” step to trim the steel back to its exact dimensions, correcting for the expansion. That final step is so important—if you skip it, the mold will be too big, and the two halves won’t clamp together right. I learned that the hard way early in my career; I machined a mold half before sending it out for heat treatment, and when it came back, it was 0.003 inches too big, which meant we had to grind down the entire surface of the half, losing days of work. Now, we always hold off on finish machining until the mold is back from heat treatment.
The final machining step is drilling and tapping for all the accessory parts: ejector pins, cooling lines, and mounting holes. Ejector pins are what push the finished part out of the mold after it opens; we drill small holes in the core half, then tap them so we can screw in the pins. Cooling lines are even more important—when molten plastic is injected into the mold, it has to cool quickly and evenly, otherwise parts will warp. We drill small, parallel lines through both mold halves, so water can flow through them to carry away heat. For complex parts, we might use conformal cooling lines, which are curved to follow the shape of the part, but that requires CNC machining with special software. Most two-piece molds use straight lines, which are easier to machine and cheaper, and they work great for simple parts. I always test the cooling lines for leaks by pressurizing them with water before putting the mold into production; a leak in a mold can ruin a day of production and damage the steel.
Once all the machining is done, we put the mold together and run a test shot with real plastic to make sure everything works. We clamp the two halves together, attach it to an injection machine, and inject a small amount of plastic. Then we take the mold apart and look at the part: is it the right shape? Are there any flashes or short shots? Does it eject smoothly without sticking? If everything is good, we do a few more test shots and send the mold to the customer. If there are issues—like a tiny air bubble in the part that means we need to adjust the vent (a small hole we machine in the mold to let air escape)—we go back and make those small adjustments, which are much easier than re-machining the whole thing.
As a two-piece mold supplier, I’ve seen firsthand how small mistakes in machining can lead to big problems for our customers. A mold that’s machined to the right tolerances, with smooth finishes and proper alignment, can run for years, making thousands of perfect parts. A mold that’s rushed or uses cheap materials might need repairs after a few hundred cycles, costing the customer time and money. That’s why every step I’ve talked about—from selecting the right steel to the final test shot—is done with care, because it’s not just a block of steel we’re machining, it’s a tool that helps our customers build products people use every day.

If you’re in the market for a two-piece mold for your product, whether it’s a consumer good, a medical component, or a part for industrial use, I can help. We work with customers to design the right mold for their needs, use only high-quality materials and precise machining processes, and stand behind every tool we build. To learn more about how we can help you bring your part to life, please reach out to our team to discuss your project requirements, and we’ll provide a detailed quote and timeline for your custom two-piece mold.
Special Structure Mold References:
- Rosato, D. V., & Rosato, M. G. (2000). Injection Molding Handbook. Kluwer Academic Publishers.
- Kalpakjian, S., & Schmid, S. R. (2014). Manufacturing Processes for Engineering Materials (7th ed.). Pearson.
- Todd, R. H., Allen, D. K., & Alting, L. (1994). Manufacturing Processes Reference Guide. Industrial Press Inc.
- Tooling U-SME. (2022). Mold Making and Machining Fundamentals. Society of Manufacturing Engineers.
Anhui Varon Mould Co., Ltd.
We are one of the most professional two piece mold manufacturers and suppliers in China, also support customized service. We warmly welcome you to wholesale premium two piece mold made in China here from our factory. If you have any enquiry about cooperation, please feel free to email us.
Address: Anhui Province, Ningguo City, Economic and Technological Development Zone, Heli Industrial Park, Dongcheng Avenue
E-mail: admin@varonmould.com.cn
WebSite: https://www.wanlongmold.com/
